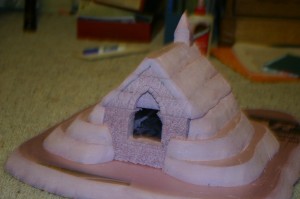
I’ve been making some slow progress on my Green Chapel terrain piece for Warhammer. Part One can be found here, if you like. But as a reminder, here’s what it looked like at the end of the “roughing out” phase:
The next step was to prepare it for painting. To do this I had to take some watered-down Elmer’s glue (or reasonable substitute) and paint over every surface. This is to keep the chemicals in the spray paint from reacting with the Styrofoam and melting it. However, this also helps my regular paints to stick, the coating on the foam tends to resist liquids. I changed my mind on the spray paint, but I’m glad I took the glue-coat step anyway.
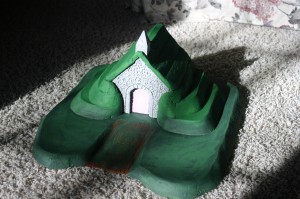
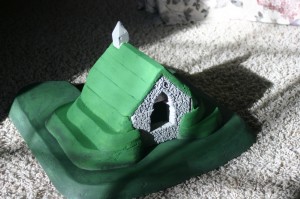
Now that it was ready to paint I went at it. The stone front and back I painted in a basic gray. The base and sod sides and roof I used at least three different shades of green to tried to blend them to look as natural as possible. Here’s how the chapel looks after two coats:
It’s now essentially ready for detailing, and I’m considering flocking all the green areas for good measure. However, before I get any farther on the paint, I need a front door and a stained-glass window. I’m still trying to find the right material for the front door, but my kids bought something this weekend that came in clear plastic packaging that provided enough material for a window insert.
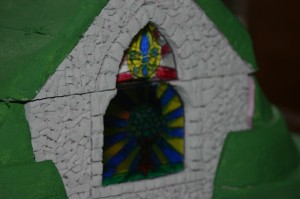
In hindsight I would probably not take this approach again, but since I want to be able to have miniatures inside the building if necessary, I made it so the top comes off. This, however, also means my window is divided into two parts. My stained glass inserts also need to come in two parts, and they don’t really match up as well as I’d like. The other problem is that the top section is solid foam. I cut a recessed area for the window, but it ends not even an inch deep. This doesn’t help the top part of the window blend well with the bottom part because the lighting is different through each. You’ll see what I mean in a minute.
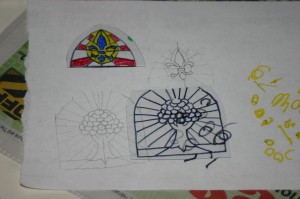
Designing the window was also trickier than I imagined. We have a set of Sharpie pens I figured I would use. I should probably have gotten pens with even finer points, but the ones I had were okay. First I had to sketch out the design. Then I would take my plastic window piece and lay it over the top and trace with black Sharpie for the frames. Then, after it had a chance to dry, I’d flip it over and color in each pane on the back.
I didn’t quite get the effect I was hoping for. The Sharpie doesn’t color opaque enough on that plastic. Next time I’ll either find a slightly less clear plastic or find a way to frost it a bit first. Still, I can’t complain too badly for a first attempt, and with my somewhat lacking artistic skills. It turned out okay.
So now we’re still looking for door material. I have a few ideas, but I need to take the time to look and see what I have to work with, or invest in some thin balsa sheets. Once I get the door in place I will go over the “stone work” with a dark wash, then vary the shade on individual stones a bit to make it a bit more natural. Then I’ll dry brush with a lighter color to bring out the 3D effect. Then, after perhaps a layer of green flock, I’ll probably experiment with making trees and put a tree or two in the “front yard”, and perhaps a bush or two around the edges, perhaps even on the roof. If I’m feeling especially daring I may try to paint some ivy on the stone areas as well.
I’ll keep you posted.

Very interesting, Thom:-) I have red also part one, and I am proud of you:-) Especially the stained glass window looks perfect…
Thank you! It’s been a fun project, and a good learning experience.